Pokazywanie postów oznaczonych etykietą Debian. Pokaż wszystkie posty

środa, 9 kwietnia 2014

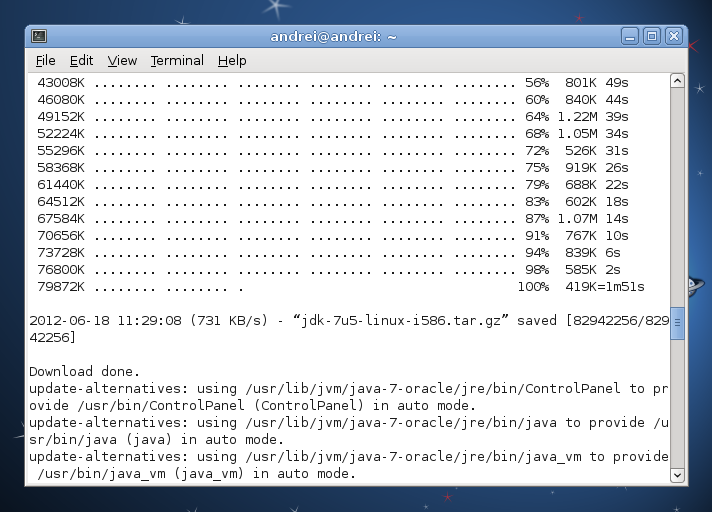
Debian + Oracle Java instalacja

http://www.webupd8.org/2012/06/how-to-install-oracle-java-7-in-debian.html


Install Oracle Java 7 (JDK7 and JRE7) in Debian


To add the WebUpd8 Oracle Java PPA repository to the Software Sources in Debian (tested on Debian Squeeze, but it should work with any Debian version), use the following commands:
su -
echo "deb http://ppa.launchpad.net/webupd8team/java/ubuntu precise main" | tee /etc/apt/sources.list.d/webupd8team-java.list
echo "deb-src http://ppa.launchpad.net/webupd8team/java/ubuntu precise main" | tee -a /etc/apt/sources.list.d/webupd8team-java.list
apt-key adv --keyserver keyserver.ubuntu.com --recv-keys EEA14886
apt-get update
apt-get install oracle-java7-installer
exit

Crunchbang users: it seems Crunchbang has an old Oracle Java 7 Installer in its repositories and because it uses a higher priority, trying to install the package from our PPA doesn't work and instead you get the old version from Crunchbang (7u7). To force the installation of the latest version, use the following command (example for Oracle JDK 7u51, replace "7u51" with the latest JDK version):
apt-get install oracle-java7-installer=7u51-0~webupd8~1
Alternatively, you can give the WebUpd8 Java PPA a priority higher than 1001.

oracle java 7 debian

oracle java 7 debian

And that's it, Oracle Java 7 (both JDK7 and JRE7) should now be installed and you should receive automatic updates with future Oracle Java 7 versions, under Debian.

Update: the installer now requires you accept the Oracle license before the installation begins. This is only required once. If for some reason you need the installation to be automated, you can run the following command to automatically accept the Oracle license:
echo oracle-java7-installer shared/accepted-oracle-license-v1-1 select true | sudo /usr/bin/debconf-set-selections


Setting Java environment variables


To automatically set up the Java 7 environment variables, you can install the following package:
sudo apt-get install oracle-java7-set-default

If you've already installed oracle-java6-set-default or oracle-java8-set-default, they will be automatically removed when installing oracle-java7-set-default (and the environment variables will be set for Oracle Java 7 instead).


For installing Oracle Java 7 in Ubuntu, see: Install Oracle Java 7 in Ubuntu via PPA Repository

poniedziałek, 10 czerwca 2013

Postgresql Debian APT install

http://www.postgresql.org/about/news/1432/

PGDG apt repository for Debian/Ubuntu

Posted on 2012-12-06
We are pleased to announce the availability of the PostgreSQL Global Development Group apt repository of PostgreSQL packages for Debian and Ubuntu.
The repository itself is located at http://apt.postgresql.org/pub/repos/apt/, with instructions in the PostgreSQL wiki at https://wiki.postgresql.org/wiki/Apt. The FAQ list is athttps://wiki.postgresql.org/wiki/Apt/FAQ.
The repository already includes the latest PostgreSQL versions released today.
People using the old "pgapt.debian.net" location of this repository should update their sources.list entries.

poniedziałek, 2 kwietnia 2012

SSH key authentication


4. SSH with Keys in a console window

This first short wil learn us how to generate a key without a passphrase, and use it in a console.

4.1 Creating A Key

When you want to use ssh with keys, the first thing that you will need is a key. If you want to know more about how this mechanism works you can have a look in chapter 3, SSH essentials. Hence there are 2 versions, we will show examples for the both of them.

4.2 Protocol version 1 key generation

To create the most simple key, with the default encryption, open up a console, and enter the following command :

[dave@caprice dave]$ ssh-keygen
Wil output the following :

Generating public/private rsa1 key pair.
Enter file in which to save the key (/home/dave/.ssh/identity): /home/dave/.ssh/identity
Enter passphrase (empty for no passphrase):
Enter same passphrase again:
Your identification has been saved in /home/dave/.ssh/identity.
Your public key has been saved in /home/dave/.ssh/identity.pub.
The key fingerprint is:
22:bc:0b:fe:f5:06:1d:c0:05:ea:59:09:e3:07:8a:8c dave@caprice
When asked for a "passphrase", we won't enter one. Just press enter twice.

The ssh-keygen program will now generate both your public and your private key. For the sake of this first simple tutorial I will call these files by their default names "identity" and the public key "identity.pub".

Your keys are stored in the .ssh/ directory in your home directory, but you can store them where ever you'd like. Good practice is to backup your keys on a floppy. If you do so, guard this floppy with your life!

Lets have a look at your keys.

cd ~.ssh; ls -l
-rw------- 1 dave dave 526 Nov 2 01:33 identity
-rw-r--r-- 1 dave dave 330 Nov 2 01:33 identity.pub
The file identity contains your private key. YOU SHOULD GUARD THIS KEY WITH YOUR LIFE! This key is used to gain access on systems which have your private key listed in their authorized keys file. I cannot stress this enough, dont have your keys drifting around. Also, make sure your private key always is chmod 600, so other users on the system won't have access to it.

The file identity.pub contains your public key, which can be added to other system's authorized keys files. We will get to adding keys later.

4.3 Protocol version 2 key generation

Creating a version 2 keypair is much like creating a version 1 keypair. Except for the fact that the SSH protocol version 2 uses different encryption algorithms for its encryption. In this case we can even choos it ourselves! Huray! To find out which versions are available on your system I'd advise you to have a look in the ssh-keygen manpage.

In our example we wil create a keypair using dsa encryption. This can be done by passing the key encryption method type to ssh-keygen. This is done in the following way :

[dave@caprice dave]$ ssh-keygen -t dsa
Which will output the following :

[dave@caprice dave]$ ssh-keygen -t dsa
Generating public/private dsa key pair.
Enter file in which to save the key (/home/dave/.ssh/id_dsa):
Enter passphrase (empty for no passphrase):
Enter same passphrase again:
Your identification has been saved in /home/dave/.ssh/id_dsa.
Your public key has been saved in /home/dave/.ssh/id_dsa.pub.
The key fingerprint is:
7b:ab:75:32:9e:b6:6c:4b:29:dc:2a:2b:8c:2f:4e:37 dave@caprice
Again, we will retain the default locations, and we will not use a passphrase either.

Your keys are stored in the .ssh/ directory in your home directory.

Lets have a look at your keys.

cd ~.ssh; ls -l
-rw------- 1 dave dave 526 Nov 3 01:21 id_dsa
-rw-r--r-- 1 dave dave 330 Nov 3 01:21 id_dsa.pub
The file id_dsa contains your version 2 private key.

The file id_dsa.pub contains your version 2 public key, which can be added to other system's authorized keys file.

Again, I have listed a full ls -l with permissions, make sure you have the permissions set up correctly, otherwise other users may be able to snatch it from you. It is also a good idea to give your keys a non-standard name, since it makes guessing the name of your keypair files more easy.

4.4 Placing the public key on the remote server

To be able to log in to remote systems using your pair of keys, you will first have to add your public key on the remote server to the authorized_keys (for version 1) file, and the authorized_keys2 (for version2) file in the .ssh/ directory in your home directory on the remote machine.

In our example we will assume you don't have any keys in the authorized_keys files on the remote server. (Hint: If you do not have a remote shell, you can always use your own useraccount on your local machine as a remote shell (ssh localhost))

First we will upload the public keys to the remote server :

[dave@capricedave]$ cd .ssh/
[dave@caprice .ssh]$ scp identity.pub dave@192.168.1.3:./identity.pub
identity.pub 100% |*****************************************************| 526 00:00
[dave@caprice .ssh]$ scp id_dsa.pub dave@192.168.1.3:./id_dsa.pub
identity.pub 100% |*****************************************************| 614 00:00
This will place your keys in your home directory on the remote server. After that we will login on the remote server using ssh or telnet the conventional way... with a password.

When you are logged in you should create a .ssh directory, and inside the .ssh/ directory create an authorized_keys and an authorized_keys2 file and add the keys to the files. Make sure the files are not readable for other users/groups. chmod 600 authorized_keys* does the trick.

Adding the public key for version 1 works like this:

[dave@caprice dave]$ ssh 192.168.1.3 -v
[I edited out the verbose output, and entered the password]
[Remember kids, always use -v so dont try this at home :) ]

[dave@julia dave]$ mkdir .ssh
[dave@julia dave]$ chmod 700 .ssh
[dave@julia dave]$ cd .ssh
[dave@julia .ssh]$ touch authorized_keys
[dave@julia .ssh]$ chmod 600 authorized_keys
[dave@julia .ssh]$ cat ../identity.pub >> authorized_keys
[dave@julia .ssh]$ rm ../identity.pub
Placing the key for version 2 works about the same :

[dave@julia dave]$ cd .ssh
[dave@julia .ssh]$ touch authorized_keys2
[dave@julia .ssh]$ chmod 600 authorized_keys2
[dave@julia .ssh]$ cat ../id_dsa.pub >> authorized_keys2
[dave@julia .ssh]$ rm ../id_dsa.pub
If you take a little peek inside your public key files, you will find it to be a bunch of crypto, separated over a couple of rules. The public key is *1 line*. It is worth to note that the entire public key file should be one line in the authorized_keys files. So using >> is preferred over copying and pasting it from one document to another. This could put line breaks in your key which makes it useless.

Either way, your keys are in place, you are ready to go to the final step and log in using your keys.

4.5 Log in using your key

To log in using your key use the ssh command. We will add -1 to make sure we are using SSH Protocol version 1.

ssh -1 -v dave@192.168.1.3
This logs you into a system using your version 1 key.

Try it again, now for version 2

ssh -2 -v dave@192.168.1.3
Have a look in the output of both ssh logins and you will be able to see some differences between version 1 and 2.
Debian NTP- serwer czasu2 - ntpdate-debian


NTP, the Network Time Protocol, is used to keep computer clocks accurate over the Internet, or by following an accurate hardware receiver which interprets GPS, DCF-77, NIST or similar time signals.
ntpdate is a simple NTP client which allows a system’s clock to be set to match the time obtained by communicating with one or more servers.

ntpdate is optional (but recommended) if you’re running an NTP server, because initially setting the system clock to an almost-correct time will help the NTP server synchronize faster.

The ntpdate client by itself is useful for occasionally setting the time on machines that are not on the net full-time, such as laptops.

Install ntp client in Debian

#apt-get install ntpdate

Install ntp client in Ubuntu

sudo apt-get install ntpdate

ntpdate will automatically run while bboting your system. Ubuntu stores script at /etc/network/if-up.d/ntpdate location.

If you wish to just run script again just type command

sudo /etc/network/if-up.d/ntpdate

sudo ntpdate pool.ntp.org

If you want to use you own ntp servers you need to edit the /etc/default/ntpdate file using the following command

sudo vi /etc/default/ntpdate

File looks like below

# servers to check. (Separate multiple servers with spaces.)
NTPSERVERS=”0.debian.pool.ntp.org 1.debian.pool.ntp.org 2.debian.pool.ntp.org 3.debian.pool.ntp.org”
#
# additional options for ntpdate
#NTPOPTIONS=”-v”
NTPOPTIONS=”-u”
NTPSERVERS=”ntp.ubuntu.com”

If you wan to use your own NTP server enter the list of NTP servers under NTPSERVERS

To avoid stepping the clock you must run ntpdate every 1 or 2 hours using cronjob

crontab -e

#Setup NTPDATE

@hourly /etc/network/if-up.d/ntpdate

Save and close the file.

You can also use the following script to run every hour from your cronjob

#!/bin/bash

/usr/sbin/ntpdate -s

/sbin/hwclock --adjust

/sbin/hwclock --systohc

Debian NTP - SERWER CZASU 1


The Network Time Protocol (NTP) is a protocol for synchronizing the clocks of computer systems over packet-switched, variable-latency data networks. NTP uses UDP port 123 as its transport layer. It is designed particularly to resist the effects of variable latency (Jitter).
Using NTP is a great way to keep your system clock set correctly. It works by contacting a number of servers around the world, asking them for the time and then calculating what the correct local time is from their responses.

Install NTP server in Debian

#apt-get install ntp ntpdate ntp-server

This will install all the required packages for NTP

Configuring NTP Server

By Default main configuration file located at /etc/ntp.conf

Default configuration file looks like below


#/etc/ntp.conf, configuration for ntpd

driftfile /var/lib/ntp/ntp.drift
statsdir /var/log/ntpstats/

statistics loopstats peerstats clockstats
filegen loopstats file loopstats type day enable
filegen peerstats file peerstats type day enable
filegen clockstats file clockstats type day enable

# You do need to talk to an NTP server or two (or three).
#server ntp.your-provider.example

# pool.ntp.org maps to more than 300 low-stratum NTP servers.
# Your server will pick a different set every time it starts up.
# *** Please consider joining the pool! ***
# *** ***
server 0.debian.pool.ntp.org iburst
server 1.debian.pool.ntp.org iburst
server 2.debian.pool.ntp.org iburst
server 3.debian.pool.ntp.org iburst

# By default, exchange time with everybody, but don't allow configuration.
# See /usr/share/doc/ntp-doc/html/accopt.html for details.
restrict -4 default kod notrap nomodify nopeer noquery
restrict -6 default kod notrap nomodify nopeer noquery

# Local users may interrogate the ntp server more closely.
restrict 127.0.0.1
restrict ::1

# Clients from this (example!) subnet have unlimited access,
# but only if cryptographically authenticated
#restrict 192.168.123.0 mask 255.255.255.0 notrust

# If you want to provide time to your local subnet, change the next line.
# (Again, the address is an example only.)
#broadcast 192.168.123.255

# If you want to listen to time broadcasts on your local subnet,
# de-comment the next lines. Please do this only if you trust everybody
# on the network!
#disable auth
#broadcastclient

Example Configuration

You need to add a number of servers to the server list. The Debian default is pool.ntp.org which works but isn't always amazingly accurate because it makes no attempt to use time servers near you. If you want more accuracy use the time servers either on your continent (for instance europe.pool.ntp.org) or your country (for instance uk.pool.ntp.org) one of your local country servers.The optimal number of servers to listen to is three but two will also give a good accuracy. If your ISP runs a time server for you it is worth including it in your server list as it will often be more accurate than the pooled servers and will help keep the load down on the pool.

I am using the following two servers for my configuration

server ntp0.pipex.net
server ntp1.pipex.net

Restrict the type of access you allow these servers. In this example the servers are not allowed to modify the run-time configuration or query your Linux NTP server.

restrict otherntp.server.org mask 255.255.255.255 nomodify notrap noquery
restrict ntp.research.gov mask 255.255.255.255 nomodify notrap noquery

The mask 255.255.255.255 statement is really a subnet mask limiting access to the single IP address of the remote NTP servers.

If this server is also going to provide time for other computers, such as PCs, other Linux servers and networking devices, then you'll have to define the networks from which this server will accept NTP synchronization requests. You do so with a modified restrict statement removing the noquery keyword to allow the network to query your NTP server. The syntax is:

restrict 192.168.1.0 mask 255.255.255.0 nomodify notrap

In this case the mask statement has been expanded to include all 255 possible IP addresses on the local network.

We also want to make sure that localhost (the universal IP address used to refer to a Linux server itself) has full access without any restricting keywords

restrict 127.0.0.1

Save the file and exit

Now you need to run the ntpdate command against your server

#ntpdate ntp0.pipex.net

restart NTP for these settings to take effect using the following command

#/etc/init.d/ntp restart

You can now configure other Linux hosts on your network to synchronize with this new master NTP server in a similar fashion.

Determining If NTP Is Synchronized Properly

Use the ntpq command to see the servers with which you are synchronized. It provided you with a list of configured time servers and the delay, offset and jitter that your server is experiencing with them. For correct synchronization, the delay and offset values should be non-zero and the jitter value should be under 100.

#ntpq -p

Output looks like below


A star by any one of the names means that the system clock is synchronising with the NTP clock. If you don't have a star (as in the example above) it means that the clocks are unreachable, already synchronized to this server or has an outrageous synchronization distance. Try running ntpdate (you will need to stop the ntp server) with your first ntp server as an argument. This will set your system clock fairly accuratly and mean that the server will be able to choose a clock to synchronize with.

Firewall Configuration for NTP

NTP servers communicate with one another using UDP with a destination port of 123. Unlike most UDP protocols, the source port isn't a high port (above 1023), but 123 also. You'll have to allow UDP traffic on source/destination port 123 between your server and the Stratum 1/2 server with which you are synchronizing.

NTP Client Configuration

If you want to configure ntp client you need to install the following packages

#apt-get install ntp ntp-simple ntpdate

Configuring NTP client

You need to edit the /etc/ntp.conf file you need to point the following settings to NTP server ip address

Server configuration settings

server 192.168.1.1

Restrict the type of access you allow these servers. In this example the servers are not allowed to modify the run-time configuration or query your Linux NTP server.

restrict default notrust nomodify nopeer

Localhost configuration

restrict 192.168.1.1

In this case the mask statement has been expanded to include all 255 possible IP addresses on the local network.

We also want to make sure that localhost (the universal IP address used to refer to a Linux server itself) has full access without any restricting keywords

restrict 127.0.0.1

Now you need to save and exit the file

run ntpdate command against your server

ntpdate 192.168.1.1

Restart ntp service using the following command

/etc/init.d/ntp restart

If you use the date command to change time, it is worth setting also the hardware clock to the correct time. Otherwise, the time is wrong after the next reboot, since the hardware clock keeps the time when power is turned off. When the clock in the operating system shows the correct time, set the hardware clock like this

#hwclock --systohc

se the ntpq command to see the servers with which you are synchronized

#ntpq
#ntpdc -p

Ginekolog dr n. med. Piotr Siwek

Gabinet ginekologiczny specjalista ginekolog - położnik dr n. med. Piotr Siwek